Cloud Credentials
UPDATE: The Ash Console open beta has ended. Looking to launch your Avalanche L1? See our latest Ash Managed L1s offer announcement!
The Ash Console is a PaaS that allow you to deploy resources into your own cloud accounts/subscriptions/projects. To do so, you need to provide the Console with appropriate credentials.
Create cloud credentials
The Ash Console needs some high privileges to deploy resources into your cloud accounts/subscriptions/projects. We recommend you to create a dedicated account/subscription/project for the Console.
Check with your internal security team if you have any doubt.
- On AWS
- On Azure
- On Google Cloud
The Ash Console needs specific permissions to deploy resources into your AWS account. We will create a custom policy and assign it to a new user.
Create a custom policy with limited permissions
Navigate to AWS IAM/Policies and create a new policy:
Switch the editor to
JSONmode and replace the content with the following JSON:{
"Version": "2012-10-17",
"Statement": [
{
"Sid": "AshConsoleEC2Actions",
"Effect": "Allow",
"Action": [
"ec2:AssociateIamInstanceProfile",
"ec2:AttachVolume",
"ec2:AuthorizeSecurityGroupIngress",
"ec2:CreateSecurityGroup",
"ec2:CreateTags",
"ec2:CreateVolume",
"ec2:DeleteSecurityGroup",
"ec2:DeleteVolume",
"ec2:DescribeAccountAttributes",
"ec2:DescribeAvailabilityZones",
"ec2:DescribeIamInstanceProfileAssociations",
"ec2:DescribeInstances",
"ec2:DescribeInstanceTypeOfferings",
"ec2:DescribeInstanceTypes",
"ec2:DescribeInternetGateways",
"ec2:DescribeNetworkInterfaces",
"ec2:DescribeRouteTables",
"ec2:DescribeSecurityGroups",
"ec2:DescribeSpotPriceHistory",
"ec2:DescribeSubnets",
"ec2:DescribeVolumes",
"ec2:DescribeVpcs",
"ec2:DetachVolume",
"ec2:RevokeSecurityGroupIngress",
"ec2:RunInstances",
"ec2:TerminateInstances"
],
"Resource": "*"
},
{
"Sid": "AshConsoleIAMActions",
"Effect": "Allow",
"Action": [
"iam:AddRoleToInstanceProfile",
"iam:CreateInstanceProfile",
"iam:CreateRole",
"iam:DeleteInstanceProfile",
"iam:DeleteRole",
"iam:DeleteRolePolicy",
"iam:GetInstanceProfile",
"iam:GetRole",
"iam:ListInstanceProfiles",
"iam:ListRolePolicies",
"iam:ListRoles",
"iam:PassRole",
"iam:PutRolePolicy",
"iam:RemoveRoleFromInstanceProfile"
],
"Resource": "*"
},
{
"Sid": "AshConsoleSSMActions",
"Effect": "Allow",
"Action": [
"ssm:ListInstanceAssociations",
"ssm:UpdateInstanceInformation"
],
"Resource": "*"
}
]
}Click on
NextReview and create:
- Name:
AshConsole
- Name:
Click on
Create policy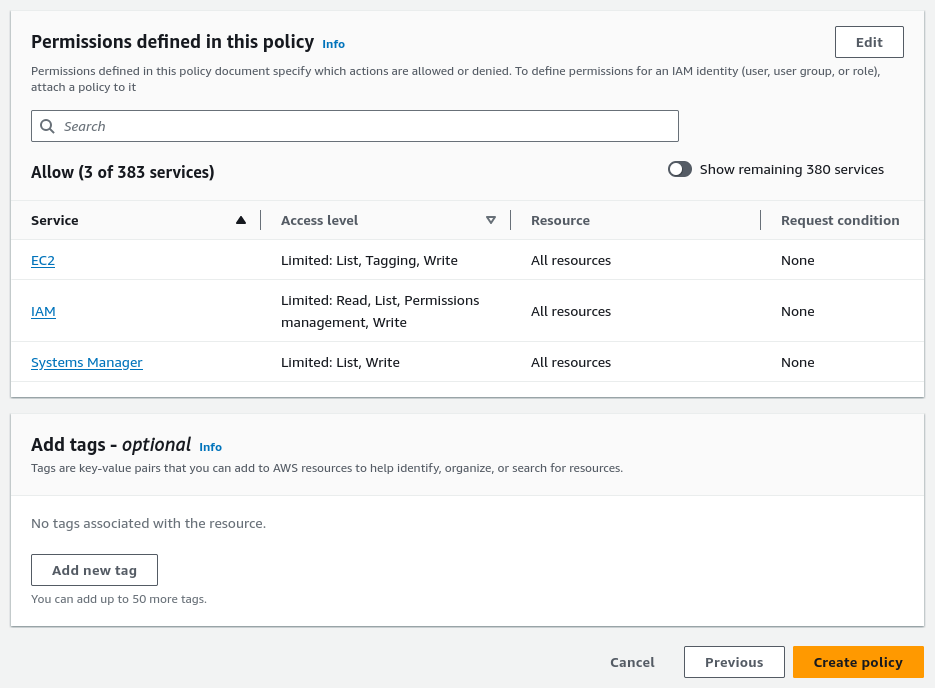
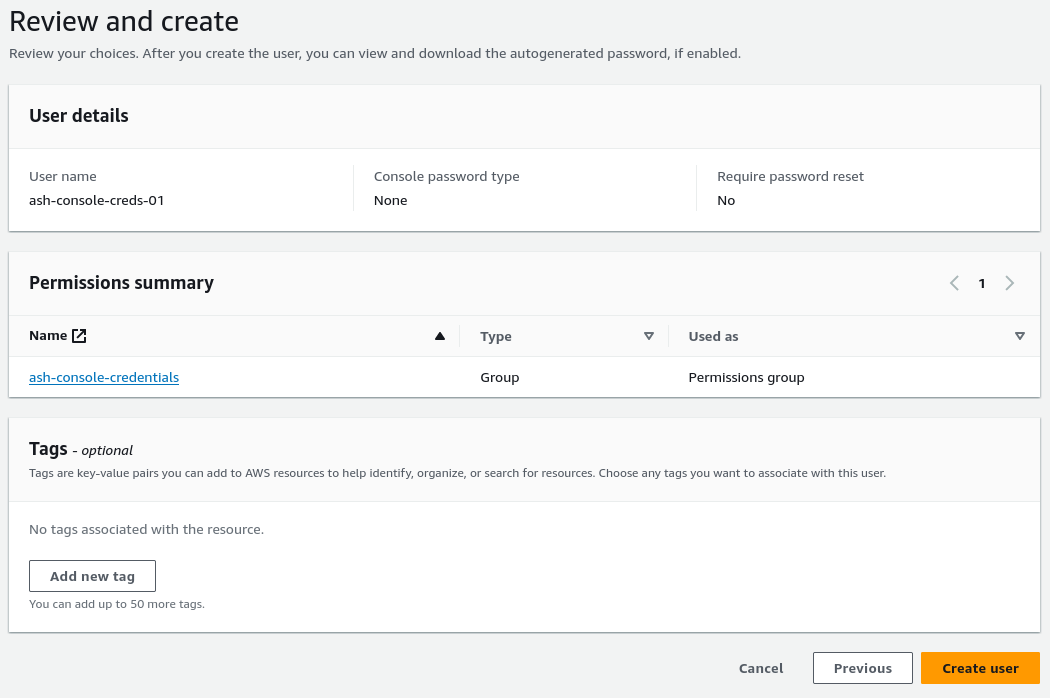
Create a user and assign the custom policy
Navigate to AWS IAM/Users and create a new user:
- User details:
- User name:
ash-console-creds-01
- User name:
- Click on
Next - Set permissions:
- Permissions options:
Attach policies directly - Permissions policies:
AshConsole
- Permissions options:
- Click on
Next - Click on
Create user
- User details:
Go to the newly created user interface IAM/Users/ash-console-creds-01
- Navigate to the
Security credentialstab - Click on
Create access keyunderAccess keys - Select the
Otheruse case - Set description tag:
ash-console-access-key-01
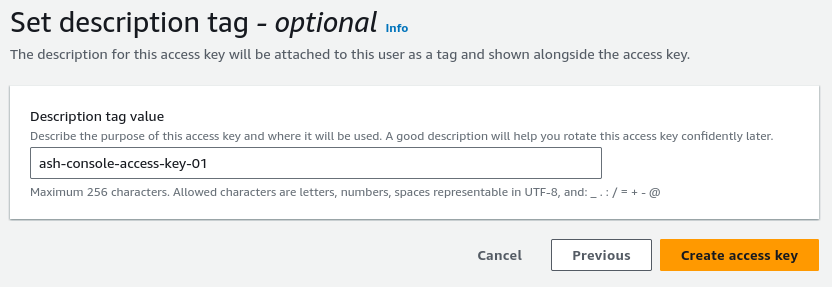
- Save the
Access keyandSecret access keysomewhere safe
- Navigate to the
The Ash Console needs specific permissions to deploy resources into your Azure subscription. We will create a custom role and assign it to a new application.
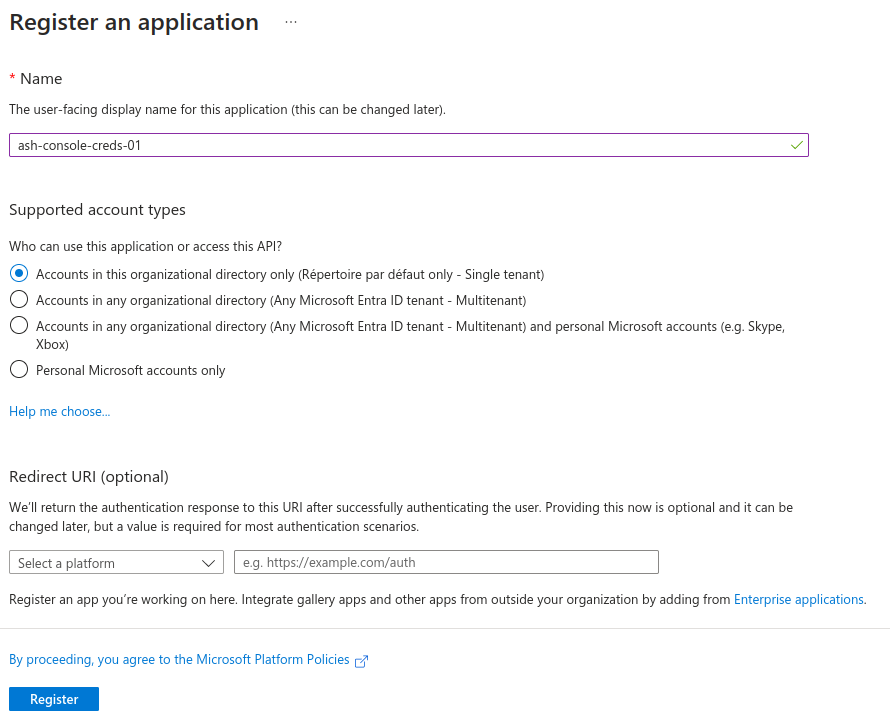
Create an application and an application password
- Navigate to
Microsoft Entra ID→App registrations - Click on
+ New registration - Register an application:
- Name:
ash-console-creds-01 - Supported account types:
Accounts in this organizational directory only
- Name:
- Click on
Register
- Navigate to the
Certificates & secretstab of the newly created application - Click on
+ New client secret - Add a client secret:
- Description:
ash-console-creds-01-password - Expires: Set the expiration date to whatever you see fit
- Description:
- Click on
Add - Save the
Valueof the newly created client secret somewhere safe
Create a custom role with limited permissions
Create the AshConsole role:
Navigate to your subscription
Access control (IAM)tabClick on
+ Addand selectAdd custom roleCreate a custom role
In the
Basictab- Custom role name:
AshConsole
- Custom role name:
Navigate to the
JSONtab and replace thepermissionsproperty with the following JSON:{
"permissions": [
{
"actions": [
"Microsoft.Compute/skus/read",
"Microsoft.Compute/virtualMachineScaleSets/read",
"Microsoft.Compute/virtualMachineScaleSets/write",
"Microsoft.Compute/virtualMachineScaleSets/delete",
"Microsoft.Compute/virtualMachineScaleSets/start/action",
"Microsoft.Compute/virtualMachineScaleSets/powerOff/action",
"Microsoft.Compute/virtualMachineScaleSets/restart/action",
"Microsoft.Compute/virtualMachineScaleSets/deallocate/action",
"Microsoft.Compute/virtualMachines/read",
"Microsoft.Compute/virtualMachines/write",
"Microsoft.Compute/virtualMachines/delete",
"Microsoft.Compute/virtualMachines/start/action",
"Microsoft.Compute/virtualMachines/powerOff/action",
"Microsoft.Compute/virtualMachines/restart/action",
"Microsoft.Compute/virtualMachines/deallocate/action",
"Microsoft.Compute/disks/read",
"Microsoft.Compute/disks/delete",
"Microsoft.Compute/disks/write",
"Microsoft.Compute/availabilitySets/read",
"Microsoft.Compute/availabilitySets/delete",
"Microsoft.Compute/availabilitySets/write",
"Microsoft.Network/networkSecurityGroups/read",
"Microsoft.Network/networkSecurityGroups/write",
"Microsoft.Network/networkSecurityGroups/delete",
"Microsoft.Network/networkSecurityGroups/join/action",
"Microsoft.Network/networkSecurityGroups/securityRules/read",
"Microsoft.Network/networkSecurityGroups/securityRules/write",
"Microsoft.Network/networkSecurityGroups/securityRules/delete",
"Microsoft.Network/virtualNetworks/read",
"Microsoft.Network/virtualNetworks/write",
"Microsoft.Network/virtualNetworks/delete",
"Microsoft.Network/virtualNetworks/subnets/read",
"Microsoft.Network/virtualNetworks/subnets/write",
"Microsoft.Network/virtualNetworks/subnets/delete",
"Microsoft.Network/virtualNetworks/subnets/join/action",
"Microsoft.Network/publicIPAddresses/read",
"Microsoft.Network/publicIPAddresses/write",
"Microsoft.Network/publicIPAddresses/delete",
"Microsoft.Network/publicIPAddresses/join/action",
"Microsoft.Network/networkInterfaces/read",
"Microsoft.Network/networkInterfaces/write",
"Microsoft.Network/networkInterfaces/delete",
"Microsoft.Network/networkInterfaces/join/action",
"Microsoft.Resources/subscriptions/resourceGroups/read",
"Microsoft.Resources/subscriptions/resourceGroups/write",
"Microsoft.Resources/subscriptions/resourceGroups/delete",
"Microsoft.Resources/deployments/read",
"Microsoft.Resources/deployments/write",
"Microsoft.Resources/deployments/delete",
"Microsoft.Resources/deployments/cancel/action",
"Microsoft.Resources/deployments/validate/action",
"Microsoft.Resources/deployments/operationStatuses/read"
],
"notActions": [],
"dataActions": [],
"notDataActions": []
}
]
}Click on
Review + createand thenCreate

Assign the custom role to the application
- Navigate to your subscription
Access control (IAM)tab - Click on
+ Addand selectAdd role assignment - Add role assignment:
- Role:
AshConsole - Assign access to:
Azure AD user, group, or service principal - Select members:
ash-console-creds-01
- Role:
- Click on
Review + assignand thenAssign
The Ash Console needs specific permissions to deploy resources into your Google Cloud project. We will create a new service account and give it the appropriate roles.
Create a service account with limited permissions
Navigate to
IAM & Admin→Service accountsClick on
+ Create service accountCreate service account:
- Service account name:
ash-console-creds-01 - Service account ID:
ash-console-creds-01
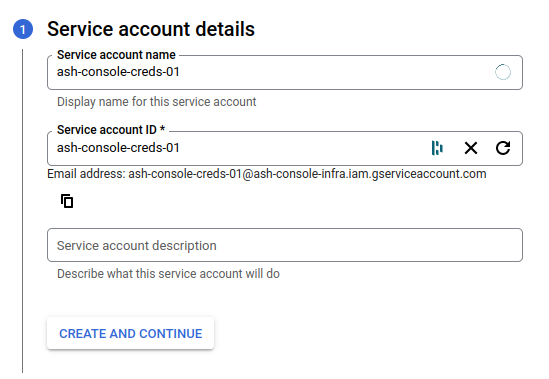
- Service account name:
Click on
Create and continueGrant this service account access to project:
- Role:
Service Account Key Admin - Role:
Compute Instance Admin (v1) - Role:
Compute Security Admin
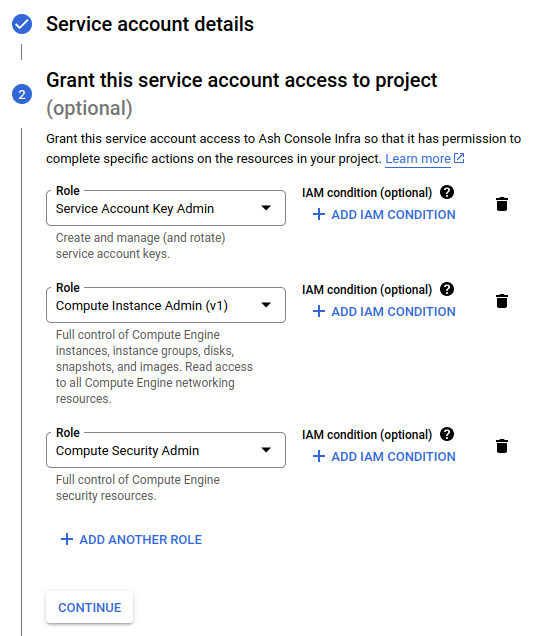
- Role:
Click on
Done
Create a service account key
- Navigate to
IAM & Admin→Service accounts - Click on the newly created service account
ash-console-creds-01 - Navigate to the
Keystab - Click on
ADD KEYand selectCreate new key - Select
JSONand click onCREATE - Save the downloaded JSON file somewhere safe
You can easily get the service account RSA private key with jq:
jq -r '.private_key' ./${project_id}-${key_id}.json > ash-console-creds-01.key
Add cloud credentials to the Console as a secret
- AWS credentials
- Azure credentials
- Google credentials
- Using the Ash Console
- Using the Ash CLI
- Using the Ash Console API
From the Ash Console project overview page, navigate to the Secrets tab:
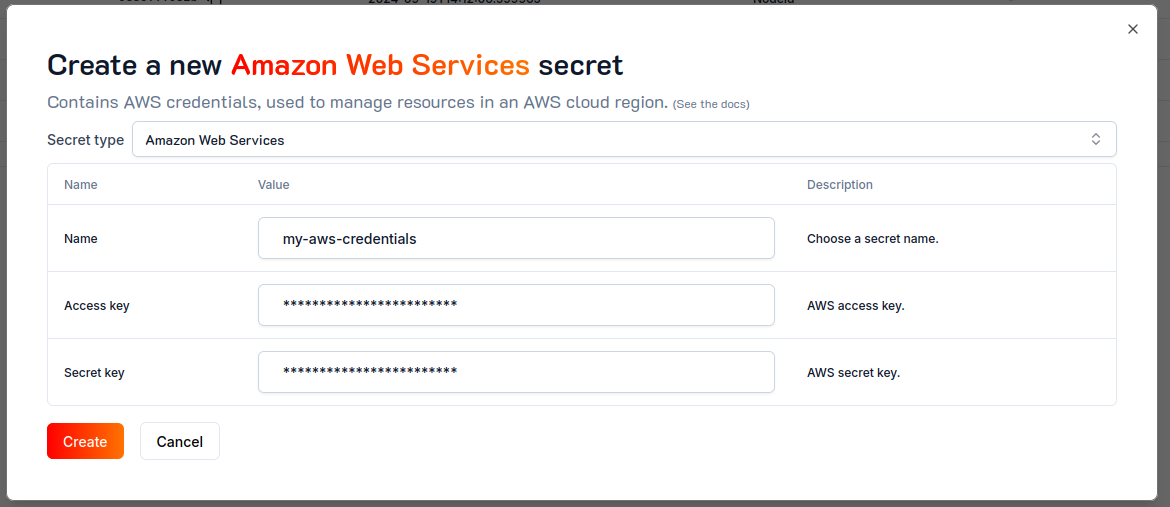
- Click on the
Create Secretbutton. - Select the
Amazon Web Servicessecret type. - Pick a name for your secret, e.g.,
my-aws-credentials. - Paste the Access and Secret keys generated in the previous step.
- Click on the
Createbutton.
To create a new awsCredentials secret, use the create secret command and provide the required secret properties as JSON:
ash console secret create '{
  name: my-aws-credentials,
  secretType: awsCredentials,
  accessKey: "***",
  secretKey: "***"
}'
Secret created successfully!
+--------------------+-------------+----------------+------------------+---------+
| Secret name        | Secret ID   | Type           | Created at       | Used by |
+====================+=============+================+==================+=========+
| my-aws-credentials | 3629...4e59 | AwsCredentials | 2023-11-08T16:04 | 0       |
+--------------------+-------------+----------------+------------------+---------+
See Authentication for more information on how to get an access token.
To create a new awsCredentials secret, you have to send a POST request with the required secret properties as JSON:
curl -X POST https://api.console.ash.center/secrets \
  -H "Authorization: Bearer ${access_token}" \
  -H "Content-Type: application/json" \
  -d '{"name": "my-aws-credentials", "secretType": "awsCredentials", "accessKey": "***", "secretKey": "***"}'
{
  "accessKey": "***",
  "created": "2023-11-08T16:10:51.134222",
  "id": "6838cc30-58b1-4fc1-b008-8cde7df34594",
  "name": "my-aws-credentials",
  "ownerId": "287090ee-7fae-4bd7-9263-d690959edc26",
  "secretKey": "**********",
  "secretType": "awsCredentials",
  "usedBy": {}
}
You can now use the secret upon cloud region addition to a project!
- Using the Ash Console
- Using the Ash CLI
- Using the Ash Console API
From the Ash Console project overview page, navigate to the Secrets tab:
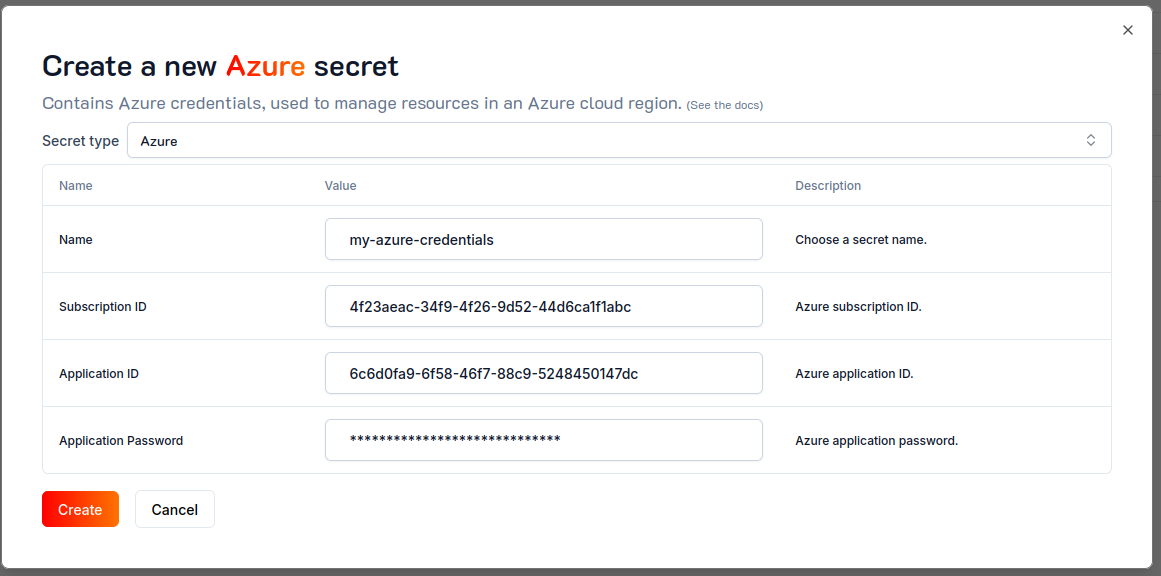
- Click on the
Create Secretbutton. - Select the
Azuresecret type. - Pick a name for your secret, e.g.,
my-azure-credentials. - Paste the Subscription ID, Application ID, and Application Password generated in the previous step.
- Click on the
Createbutton.
To create a new azureCredentials secret, use the create secret command and provide the required secret properties as JSON:
ash console secret create '{
  name: my-azure-credentials,
  secretType: azureCredentials,
  subscriptionId: 4f23aeac-34f9-4f26-9d52-44d6ca1f1abc,
  applicationId: 6c6d0fa9-6f58-46f7-88c9-5248450147dc,
  applicationPassword: "***"
}'
Secret created successfully!
+----------------------+-------------+------------------+------------------+---------+
| Secret name          | Secret ID   | Type             | Created at       | Used by |
+======================+=============+==================+==================+=========+
| my-azure-credentials | 2d9b...7f1a | AzureCredentials | 2023-11-08T16:24 | 0       |
+----------------------+-------------+------------------+------------------+---------+
See Authentication for more information on how to get an access token.
To create a new azureCredentials secret, you have to send a POST request with the required secret properties as JSON:
curl -X POST https://api.console.ash.center/secrets \
  -H "Authorization: Bearer ${access_token}" \
  -H "Content-Type: application/json" \
  -d '{"name": "my-azure-credentials", "secretType": "azureCredentials", "subscriptionId": "4f23aeac-34f9-4f26-9d52-44d6ca1f1abc", "applicationId": "6c6d0fa9-6f58-46f7-88c9-5248450147dc", "applicationPassword": "***"}'
{
  "applicationId": "6c6d0fa9-6f58-46f7-88c9-5248450147dc",
  "applicationPassword": "**********",
  "created": "2023-11-08T16:26:27.224459",
  "id": "eac5de30-b546-4b0f-acf3-e18690035aa1",
  "name": "my-azure-credentials",
  "ownerId": "287090ee-7fae-4bd7-9263-d690959edc26",
  "secretType": "azureCredentials",
  "subscriptionId": "4f23aeac-34f9-4f26-9d52-44d6ca1f1abc",
  "usedBy": {}
}
- Using the Ash Console
- Using the Ash CLI
- Using the Ash Console API
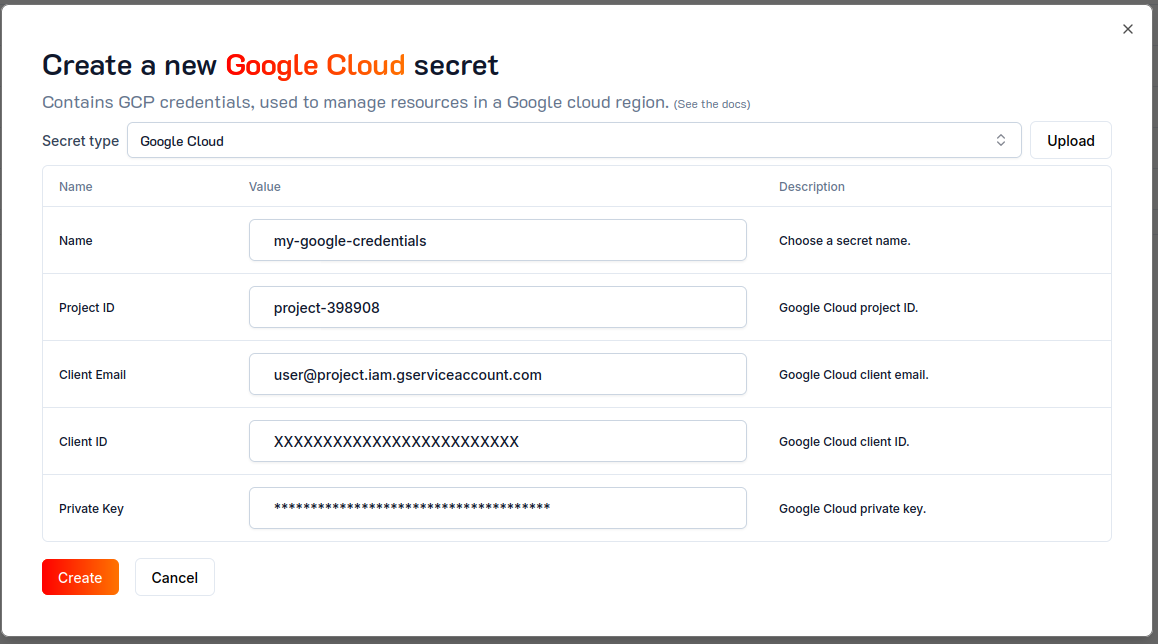
From the Ash Console project overview page, navigate to the Secrets tab:
- Click on the
Create Secretbutton. - Select the
Google Cloudsecret type. - Click on the
Uploadbutton and select the JSON file you downloaded in the previous step. - Click on the
Createbutton.
To create a new googleCredentials secret, use the create secret command and provide the required secret properties as JSON.
The privateKey can be provided as a PEM key file path (or as a base-64 encoded string):
ash console secret create '{
  name: my-google-credentials,
  secretType: googleCredentials,
  projectId: ***,
  clientEmail: ash-console-creds-01@***.iam.gserviceaccount.com,
  clientId: ***,
  privateKey: "~/Downloads/ash-console-creds-01.key"
}'
Note: Make sure to replace *** with the appropriate field of the JSON file exported from Google Cloud.
Secret created successfully!
+-----------------------+-------------+-------------------+------------------+---------+
| Secret name           | Secret ID   | Type              | Created at       | Used by |
+=======================+=============+===================+==================+=========+
| my-google-credentials | 78e5...8fa3 | GoogleCredentials | 2023-11-08T17:36 | 0       |
+-----------------------+-------------+-------------------+------------------+---------+
See Authentication for more information on how to get an access token.
To create a new googleCredentials secret, you have to send a POST request with the required secret properties as JSON.
The privateKey can be provided as a base-64 encoded string:
# Encode the private key as a base-64 string
export google_key=$(cat ~/Downloads/ash-console-creds-01.key | base64 -w 0)

curl -X POST https://api.console.ash.center/secrets \
  -H "Authorization: Bearer ${access_token}" \
  -H "Content-Type: application/json" \
  -d "{\"name\": \"my-google-credentials\", \"secretType\": \"googleCredentials\", \"projectId\": \"***\", \"clientEmail\": \"[email protected]\", \"clientId\": \"***\", \"privateKey\": \"${google_key}\"}"
{
  "clientEmail": "[email protected]",
  "clientId": "***",
  "created": "2023-11-08T17:40:28.391723",
  "id": "4f5d4a9b-dfca-44d5-a203-862d93bd5296",
  "name": "my-google-credentials",
  "ownerId": "287090ee-7fae-4bd7-9263-d690959edc26",
  "privateKey": "**********",
  "projectId": "***",
  "secretType": "googleCredentials",
  "usedBy": {}
}